Hello. In this post I'll touch on using Local Notifications in our Flutter app.
First of all, the notification feature in our apps is quite important for us. It's important for reminding users about the app, showing that we're still there, and drawing users back into the app.
In Flutter, notification types are generally considered in two main categories: Local Notification and Push Notification.
Push Notifications are notifications sent to the app by a server. They can be used by integrating with services like Firebase Cloud Messaging or OneSignal.
Local Notifications are notifications created from within the app. In this post we'll cover this notification type.
We can use the local notification feature with many packages. In this post I'll use the flutter_local_notification package.
I'm assuming notification permissions are enabled in our app. You can read my post about permission handling here.
For our Android devices, in the AndroidManifest.xml file, inside the activity we add the lines
android:showWhenLocked="true"
android:turnScreenOn="true"
to it.
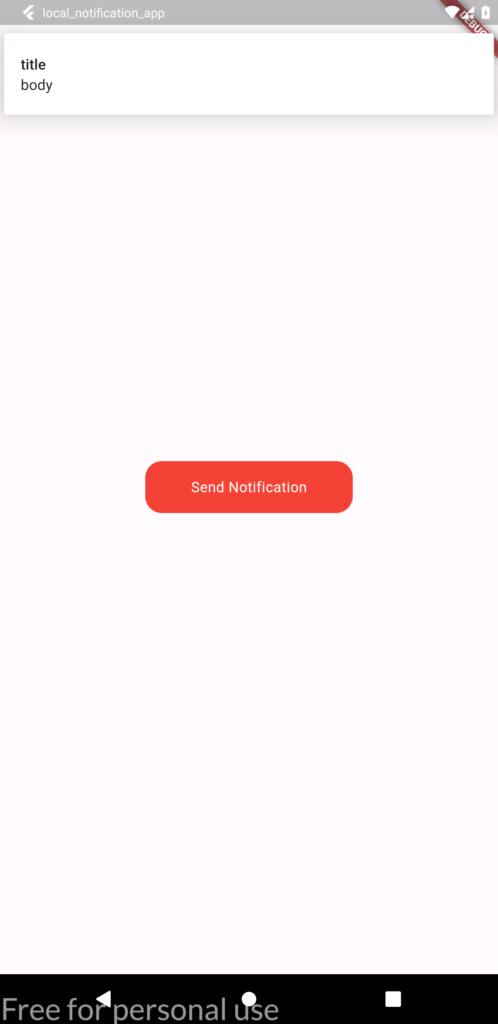
In my app the screen only has a Send Notification button. Afterwards I create a file called local_notifications.dart. Inside it we'll write the code that enables and shows our notifications.
 FlutterLocalNotificationsPlugin flutterLocalNotificationsPlugin =
      FlutterLocalNotificationsPlugin();
Inside the class we created, we first create an object named flutterLocalNotificationsPlugin from the FlutterLocalNotificationsPlugin object. It's needed to manage our notifications.
 startup() async {
    InitializationSettings initializationSettingsAndroid =
        const InitializationSettings(
      android: AndroidInitializationSettings('@mipmap/ic_launcher'),
      iOS: DarwinInitializationSettings(),
    );
    flutterLocalNotificationsPlugin.initialize(initializationSettingsAndroid,
        onDidReceiveNotificationResponse: (details) {
      print('details::$details');
    });
  }
We write our startup function. We'll call this function while the app is launching. The expression inside AndroidInitializationSettings represents the app's icon. We specify the icon to be used in notifications. DarwinInitializationSettings specifies the notification settings for iOS. It can be used in cases where we don't need any special iOS initialization. If we want to do custom initialization, that can be done with the parameters it contains.
The flutterLocalNotificationsPlugin object we created at the start is initialized by writing .initialize. The onDidReceiveNotificationResponse inside it is a callback function that will be called when a notification is received.
Now let's write the code needed to show the notification.
Future<void> showNotification() async {
    print('showNotification Start');
    const AndroidNotificationDetails androidNotificationDetails =
        AndroidNotificationDetails('your channel id', 'your channel name',
            channelDescription: 'your channel description',
            importance: Importance.max,
            priority: Priority.high,
            ticker: 'ticker');
    const NotificationDetails notificationDetails =
        NotificationDetails(android: androidNotificationDetails);

    await flutterLocalNotificationsPlugin
        .show(id++, 'title', 'body', notificationDetails, payload: 'item x');
    print('showNotification finish');
  }
The showNotification function we defined here is the function that will be called by the button on our screen. This function will trigger showing the notification.
The androidNotificationDetails object we created specifies the notification appearance and behavior for Android. Here:
'your channel id': This is the id of the notification we created. This id should have a different Id value for each notification.
'your channel name': This is the name of the notification channel that will be shown to the user. The user can see this channel name.
channelDescription: This is the description of the notification channel.
importance: This is the importance of the notification channel. Importance.max specifies the highest priority.
priority: This is the notification priority. Priority.high specifies the highest priority.
ticker: The text seen in the status bar before the notification arrives. This gives the user a quick preview.
You can customize these values however you like. Your channel name could even be your first and last name. You're free when it comes to customization.
As the final step, we can show the flutterLocalNotificationsPlugin object we created at the start to the user by writing .show.
There are many features when creating local notifications. Using a notification as a Schedule is the feature you should use if you want to fire a notification at a specific time chosen by the user. For a more detailed look, I recommend reviewing the examples found in the package contents.
For the source code –> Github