Hello. In today's post I'll give an introduction to animations in Flutter.
We don't have to use animations in our apps, but by using animation we can make our app more colorful and more beautiful. Flutter includes many different classes and methods that offer rich animation support.
Animations in Flutter
- Animation: The class that forms the basis of animations; it defines how values will change within a certain range/duration.
- AnimationController: A class used to control the animations we create. We can set properties such as start, end and duration through this class. We can also start, stop and reverse our animations if we want.
- Tween: A class that specifies the start and end values of animations.
- Curve: A class related to how our animations progress. Using the items in the Curves class, we can create animations that start slow and speed up later, and so on.
- AnimatedWidget: A widget class that updates the animation dynamically.
- Hero: One of the animation types I use the most and that is very simple to use. Especially when moving from one page to another, if there's, for example, a photo I'll use on both pages, the Hero Widget makes objects grow/shrink and move smoothly.
Let's Begin
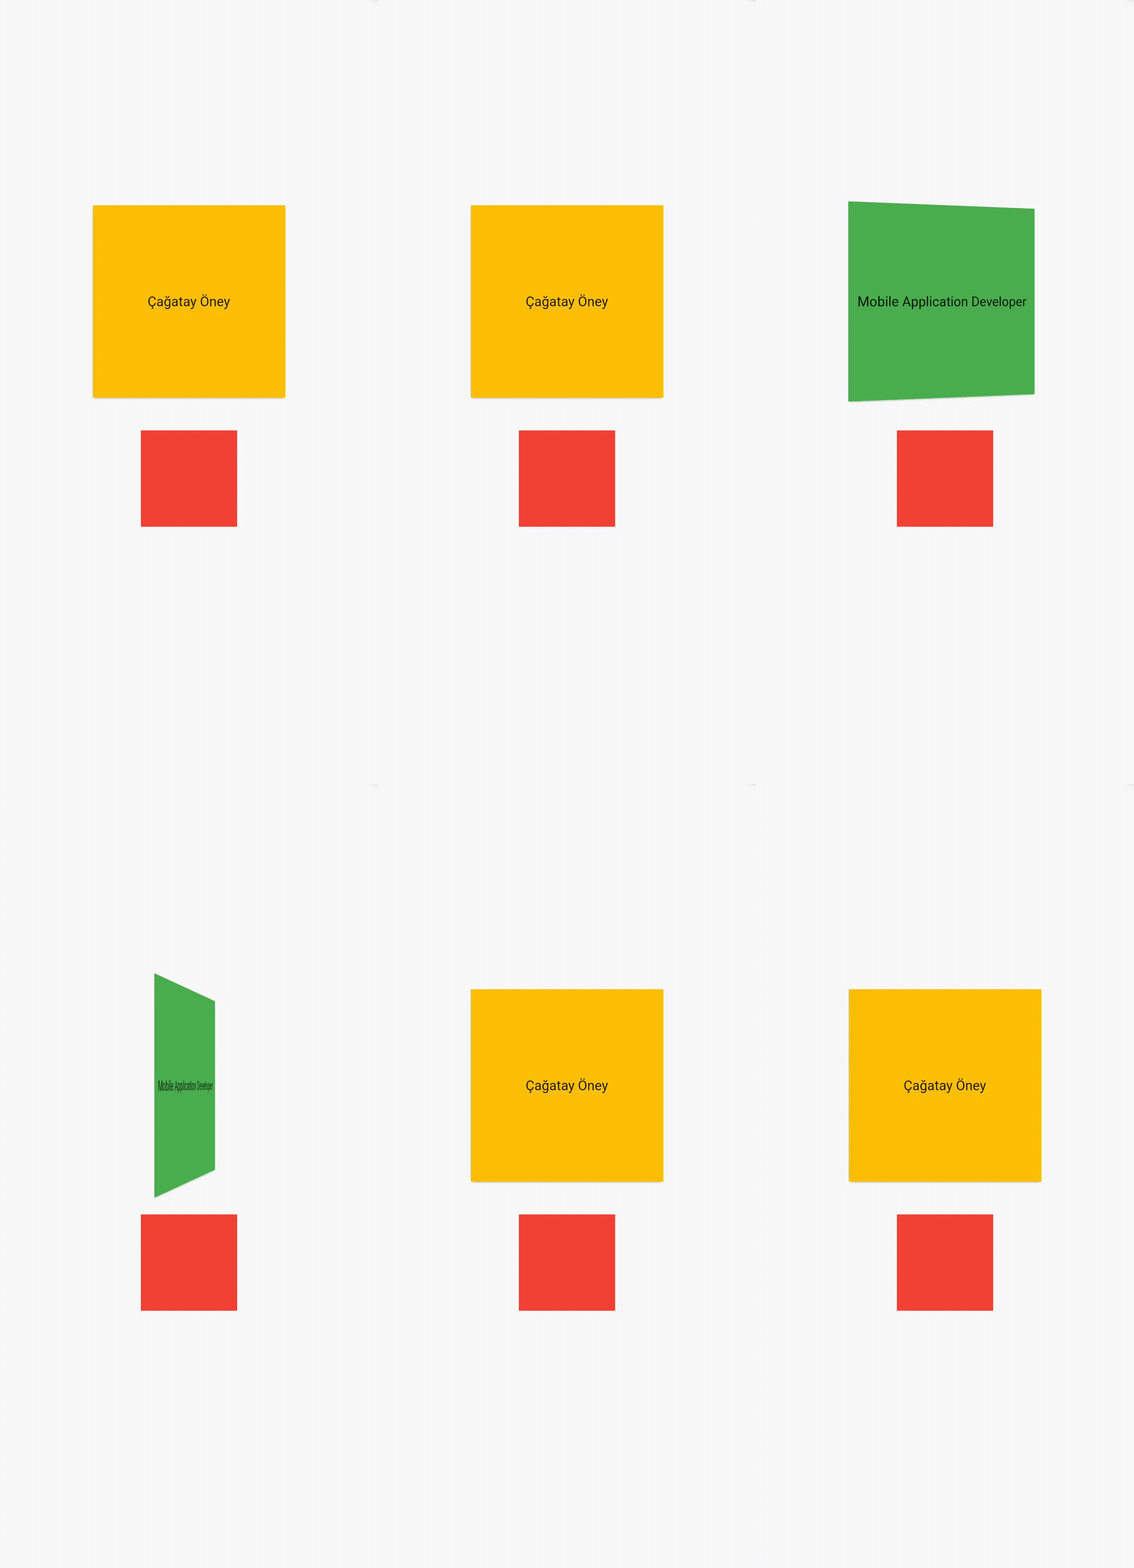
The animation I'll do will be applying a flip effect to a Container Widget.
 late AnimationController _controller;
  late Animation _animation;
  AnimationStatus _status = AnimationStatus.dismissed;
I add these variables right inside my class. Controller will let me control the animation. Animation will create the movement of my animation. With AnimationStatus I'll get the state of my animation.
 @override
  void initState() {
    super.initState();
    _controller = AnimationController(
        vsync: this, duration: const Duration(milliseconds: 1000));
    _animation = Tween(end: 1.0, begin: 0.0).animate(_controller)
      ..addListener(() {
        setState(() {});
      })
      ..addStatusListener((status) {
        _status = status;
      });
  }
Inside initState I specify that my _controller is an AnimationController and how long it will take to perform this animation with Duration. There's one important extra piece of information here: vsync: this. This will probably throw an error. The reason is that our class can't be cast to the TickerProvider type.
TickerProvider is a class generally used to trigger the animation. We can cast our class to the TickerProvider type with with SingleTickerProviderStateMixin. We can solve the problem here this way.
class _HomePageState extends State<HomePage>
    with SingleTickerProviderStateMixin {
For my _animation variable, I provide the start and end values together with Tween. Then, by writing .animate, I pass in the controller I defined. By writing ..addListener I listen to this variable and redraw the screen each time by calling setState. With ..addStatusListener I hold the status value of my animation.
Now we can start drawing the Widgets that will appear on our screen.
I design two Widgets on my screen. One will only have a button function. The other will be the Widget we'll make animated. First let's take a look at the Widget that will be animated.
 Transform(
            alignment: FractionalOffset.center,
            transform: Matrix4.identity()
              ..setEntry(3, 2, 0.0015)
              ..rotateY(pi * _animation.value),
            child: Card(
              child: _animation.value <= 0.5
                  ? frontAreaWidget()
                  : backAreaWidget(),
            ),
          ),
The Transform Widget is used to control the transformation and transformation effects of a Widget.
- Transform.flip()
- Transform.rotate()
- Transform.scale()
- Transform.translate()
are some of its variants.
The alignment property I provided helps set it to rotate from its exact center. You'll understand it more clearly by trying FractionalOffset. yourself and seeing what it actually does. I think doing things by experimenting while working with animations is always both more fun and more instructive.
The transform property applies a transformation matrix. With Matrix4.identity() I create the initial transformation matrix. If I only use this matrix, I won't have applied any transformation. But with the setEntry expression I simulate a perspective transformation and make the widget shrink a bit based on distance. I recommend playing with the variables here and seeing which variable creates what kind of animation.
By using rotateY I make the Widget rotate on the y axis. By writing pi*_animation.value I calculate the rotation angle of the Widget.
Now let's get to its child. I used a Card Widget. Using the _animation.value <= 0.5 expression, I specify the front and back faces of my animation Widget. When this value is less than 0.5 I want it to draw the front face, and when it's greater than 0.5 the back face. Since this value is between 0 and 1, it shows that at 0.5, exactly in the middle, I'll draw the other Widget. By setting this value to 0.1 and 0.99 and trying it, you'll understand very clearly what I mean.
 Widget frontAreaWidget() {
    return Container(
      width: 200,
      height: 200,
      color: Colors.amber,
      child: const Center(
        child: Text('Çağatay Öney'),
      ),
    );
  }
Here the Widget I'll show on the front face is a Container Widget 200 by 200 in size.
However, my backAreaWidget will be a bit different.
Widget backAreaWidget() {
    return Transform(
      alignment: Alignment.center,
      transform: Matrix4.rotationY(pi),
      child: Container(
        width: 200,
        height: 200,
        color: Colors.green,
        child: const Center(
          child: Text('Mobile Application Developer'),
        ),
      ),
    );
  }
My backAreaWidget is actually a 200 by 200 Container just like my frontAreaWidget. However;
We've wrapped this Container Widget with a Transform. You don't have to add it. But if you don't, the Texts and Widgets you write inside it will look exactly like a mirror image. It WILL NOT plainly read Mobile Application Developer.
Here, by wrapping it with Transform and giving the transform property Matrix4.rotationY(pi), we take the mirror image of the resulting view as well, and it draws the Widget we want to see plainly.
So how do we trigger this animation?
  onTap: () {
              if (_status == AnimationStatus.dismissed) {
                _controller.forward();
              } else {
                _controller.reverse();
              }
            },
By writing this code block inside any button Widget you create, we can trigger our animation.
forward() runs the animation in the forward direction, while reverse() runs it in the reverse direction.
It may look a bit complicated, but I think you'll understand what does what more easily by playing with the numbers and experimenting.
You can find the source code here.
Thanks for reading. Happy coding, everyone.